ConfigMgr integrated with MS Intune – Missing some Intune Extension?

I assume that all of us had the same experience at least once: came to a Microsoft Intune (or EMS) project, and have to create all of the office mobile apps for Android and iOS manually on the SCCM console by our own. But this work was a really mess. Because, the research for the official links became the first pain, and then we need to provide the icons adjustment (using MS Paint?!) and then to include some description, and so on…

Well, the good news are here: these days are completely done!

For Config Mgr 2012 R2 SP1 (or SP2 if you want to call it) with CU2 (and for 1511 also), Microsoft developed and deploy a new Intune extension that create all of the Mobile Office Applications for Android and iOS. I mean, for other words, with a couple of clicks, we can replace a good amount of wasted time.

Curious? Give a deep dive on the following link:

Well, backing to the SCCM (integrated of course!)

I have to admit that this issue consumed a couple of hours, and due that fact I felt that I to share my experience on it. And to be honest, I spent a lot of time around the console, because accessing to the SQL database was never the thought that I’d in mind.

Recently, my daily routine on the SCCM was: “I’ve only three extensions for Microsoft Intune. Am I missing something?”. In fact I was…

The troubleshooting mindset was always around “My SCCM doesn’t get any extension of Office Mobile Apps”. And, once we’re are talking about “cloud services”, we heard so many times everyone telling us to wait for our SCCM to synchronize through Microsoft Intune connector to get the extensions. And that’s what I did.. and I stuck waiting… but nothing happened.

Just in case, if you ever experience a similar behavior on your customers, keep in mind that this solution is completely out of support and if you can, you should try to figure out in a “better” way because my suggestion is fully around SQL. And I am part of those SCCM guys that never ever touched on SCCM database. An yes, in the end I’d to admit: in my case, my SQL database just had an incorrect value on that.

Note: Again, this is not a supported solution! Don’t even try this on a production environment. Try this on your lab please and take your conclusions!

Sharing my “hands-on-lab” experience

First of all, I run a sql query to get some information about all of my extensions:

select L.Name, F.FeatureID, F.StateID,S.FeatureStateName,F.Flag, F.Error from MDMCFDFeature F join CFDLocalizedMetaData L on F.FeatureID=L.FeatureID join CFDFeatureState S on F.StateID=S.FeatureStateID where L.LocaleID=1033

This query returns all of the description names plus the reference ID.

When I saw the results for the first time, I just realized that my Config Mgr really had the extension! But I can’t saw in my console! Confused? This must have an explanation!

026-002

So, it’s time to get more information about the specific Extension running the following query:

Select * from CFDMetadata where FeatureID =
‘692B5EF7-0D8B-42B8-823F-0A890F65A80D’

026-003

And I found a lot of “NULL” values. So, I’ve tried the update for the specified attribute (by my own of course, and on a lab environment as always):

Be Careful if you really want to do this!

update CFDMetadata
set
MinCMVersion = ‘5.00.8239.1000’,
MaxCMVersion = ‘5.00.8239.9999’,
MoreInfoLink = ‘http://go.microsoft.com/fwlink/?LinkId=624495‘,
ReleasedDate = ‘2015-02-10 09:09:00.000’
where FeatureID =
‘692B5EF7-0D8B-42B8-823F-0A890F65A80D’ and FeatureVersion = 82391303

026-004

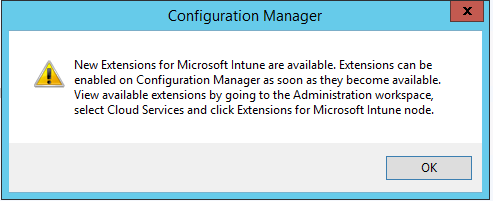
When I restart my console, the Extension pop-up warned me about some extension that I’d available to apply.

026-005

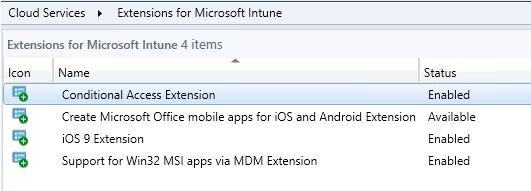
And the extension became available.

026-006

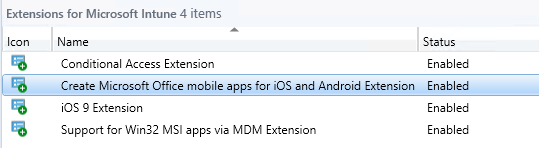
After a couple of minutes…became enabled!

026-007

The process will create the office apps automatically.

026-008

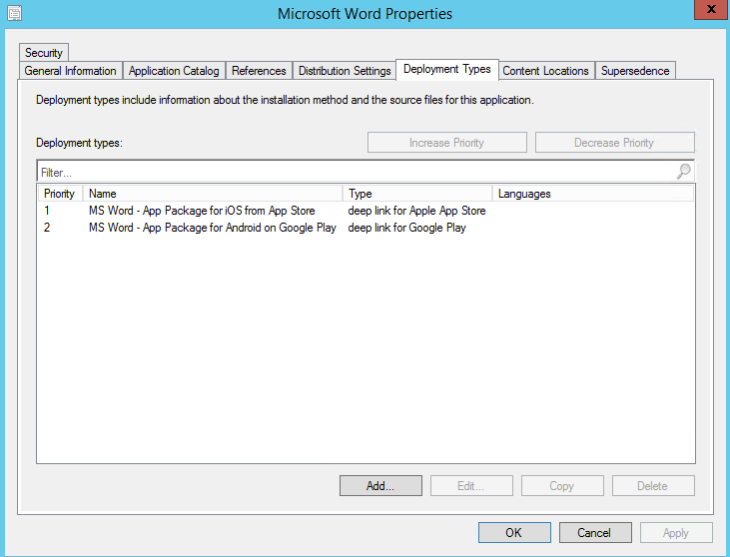
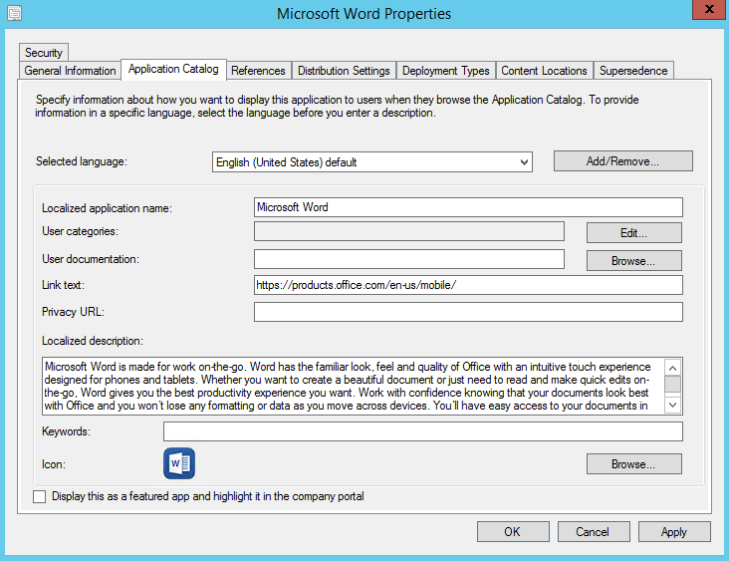
And the “Application Catalog” pane will be full filled also.

026-009

You just have to create your deployments (or advertisements if you want to call it) for your Office Mobile applications/deployment types to your customized users collection. And that’s it!

Enjoy Intune extensions! Enjoy SCCM integrated with Intune!

/ Fabio

Azure AD – Introducing SaaS plus MyApps Portal

As we know, Azure Active Directory has many benefits and we can see all of them on this link.

This post intends to share all required steps to bring the new concept (or feature) from Azure AD into organizations – SaaS.

Azure AD introduces SaaS (Software as a Service), which in a very high-level view, consists on a new way to deliver Apps to your employees without the old installation concept requirements.

There are three editions of Azure AD: Free, Basic and Premium. Once we’re running a lab, we can use the Premium (for 1month), but if you’re looking for a production environment, the good new is that the SaaS feature is supported for all of Azure editions. But (there’s always a «but») excepting the Premium, for Free and Basic editions is already limited for 10 applications per user. So, IT Admins can configure as many applications they want (with or without Single Sign-On), but each user will see only up to 10 Apps on their “My Apps panel”). This feature is better known and described as Group based application access.

To get more info check this very extended info.

Real Challenge

So, for this post I’ll share my experience and a recurrent request/concern about many customers nowadays. Your company has its own Twitter account which should be managed by the Marketing dept. to publish news, to share some reports and so on. But the main concern for many IT departments consists on that question: How many ways do they have to manage it? I’ll try a few some ways:

  1. Give/share the corp Twitter account logon to all Marketing members?
  2. Give/share the corp Twitter account logon to some Marketing “key” member?
  3. Do not give corp Twitter account to anyone.

I assume that the third option would be chosen by all. For those who choose that third option, I have good news. That’s possible with Azure AD!

Above, I’ll post a step-by-step guide to publish one application through Azure Portal, and the consequent access by Microsoft “My Apps” Portal.

Step-by-step guide

1. Create the test Group/User

On your Active Directory On Premises, create a Marketing Global and Security group.

021-001

Then create a test user. Don’t forget to assign the user logon name for <customized_tenant>.

021-002

Assign the previous created user to the previous created group.

021-003

Wait for the sync or set it manually. How? This post will help you.

2. Add Azure Application

Once this will be published through the Azure AD Management Portal, access it with your @outlook.com account.

Never forget: For Azure Management Portal, you’ll access it with a Microsoft Live ID account.

Follow the path: “Azure Active directory > «tenant_directory» > Applications”

021-004

Select the “Add” option on the bottom.

On the screen, check “Add an application from the gallery”. You can also publish LoB and external apps too.

021-005

Nowadays, Microsoft have more than 2500 available apps. You can choose whatever you want. For this example I’ll pick the Twitter app.

021-006

On the bottom, you’ll get the following message:

021-007

Once that the application is already added, you need to assign it to a specific group(s). Guess whom? Correct! The one created previously on this post!

021-008

Select the first option: “Configure single sign-on” and check “Password Single Sign-On”. Apply it.

021-009

To assign accounts, browse for “Marketing” previously created group with “Mike Smith” user as a unique member.

021-010

And click on the bottom option named “Assign”.

021-011

A prompt window will appear. On this, you’ll set the Twitter account credentials (including password). Through this way, Mike Smith doesn’t (and never won’t) know the “Enterprise twitter account”.

021-012

Apply it.

021-013

Close your browser session and ensure that the credentials won’t be saved (for the next opened session).

3. Access it through My Apps Portal

Open a new session and access to My Apps portal.

Enter the Mike Smith credentials.

And the user will get the “Twitter” app available with credentials included. Again, the user have no idea which credentials are being used. He just have access to the “authenticated” app.

021-014

Enjoy Azure AD!

/ Fabio

ConfigMgr and MS Intune lab creation – Here comes the end of the saga…plus the resume!

As promised, the (seven) previous posts can be a good starting point of Microsoft Intune.

Hope provide you all the required steps to build a laboratory to set a first experience on Intune and Config Mgr.

Once that the first saga becomes to the end, here it goes a few resume:

As an Intune / Azure / Config Mgr enthusiastic, I’ll keep focused on these technologies, so… Stay tuned! 😉

/ Fabio

ConfigMgr and MS Intune lab creation – 7th Part | iOS device Enrollment: step-by-step guide

This post intends to share my personal experience on iOS device enrollment into the Mobile Device Management Platform: Microsoft Intune.

As we know, besides to the Windows Phone, the iOS enrollment requires:

  • Apple Push Notification Certificate import;
  • The “Company Portal” app installed. Company Portal is the first element to establish contact between mobile device and Intune infrastructure.

Once the first pre-requisite was been fully described on the previous post, let’s take a dive into the second one.

Step-by-step guide:

After the manual installation of the company portal app (as a mandatory pre-requisite), you can open it and enter your Intune credentials (of an Intune user previously created and licensed). Forgot how to do it? Follow this.

Note: Once the page recognizes your tenant, will resolves to your customized branding.

020-001

You’ll be asked to enroll your device.

020-002

You’ll get the first “loading” message: “Enrolling device”.

020-003

After a few seconds later, you’ll be redirected automatically to the “Settings” page, with a Management Profile installation prompt window. Select “Install”.

020-004

Confirm the profile installation.

020-005

And confirm it again.

020-006

And again.

020-007

After a few seconds, you’ll receive the successfully “Profile Installed” message. Press “Done”.

020-008

And the “Device Enrolled” final message too.

020-009

The first synchronization will start in a few minutes.

020-010

On Config Mgr console, the behavior shall be similar for the Windows Phone and iOS – the mobile device may took some minutes to show up.

020-011

Note: As always, all posts reflects only my point-of-view and is provided “AS IS” with no warranties, confers no rights and is not supported.

Stay tuned and enjoy EMS!

/ Fabio

ConfigMgr and MS Intune lab creation – 6th Part | iOS device Enrollment: Pre-Requisites

As you probably noticed, to perform iOS device enrollment, you need to setup a pre-requisite into your Config Mgr platform (integrated with MS Intune): Apple Push Notification Certificate.

Lab assumptions:

  • System Center Configuration Manager 2012 R2 SP1 (or SP2);
  • Microsoft Intune subscription added;

On Config Mgr, follow the path “Administration > Overview > Cloud Services > Microsoft Intune Subscriptions

Through the ribbon, click on “Create APNs certificate request“.

019-001

You’ll be asked to set a path/filename to save the generated (.csr) file by Config Mgr and you’ll warned for the next steps also.

Press “Download”.

019-002

Introduce your “tenant admin” credentials and wait for the message. Don’t close this screen.

Now, click on the blue available link “Apple Push Certificate Portal”.

019-003

It will be opened an IE screen. Enter your Apple ID. If you don’t have one, create it. It’s free.

019-004

Once you’re in the portal, click on the right option named “Create a Certificate”. Upload the generated (.csr) file by Config Mgr.

019-005

Browse for the (.csr) file.

019-006

Backing to the Apple Push Certificate Portal, you’ll see a new entry! Click “Download” and save the Apple generated .pem file.

019-007

Through the path “Administration > Overview > Cloud Services > Microsoft Intune Subscriptions”, click at the ribbon “Configure Platforms” > “iOS”

019-008

Check “Enable iOS enrollment” and “Browse” for the .pem file downloaded on the Apple Certificate Portal. Apply these changes.

019-009

If you’re using your Intune subscription in a Cloud-Only mode, following this link.

You’re Config Mgr platform now supports iOS device enrollment.

Note: As always, all posts reflects only my point-of-view and is provided “AS IS” with no warranties, confers no rights and is not supported.

Enjoy EMS and stay tuned!

/ Fabio

ConfigMgr and MS Intune lab creation – 5th Part | Step-by-step: Enroll Windows Phone 8.1 device

As promised, this post intends to share my experience on a Windows Phone 8.1 device enrollment, but firstly want to share the following table which resumes all certificate requirements for each mobile OS version.

Note: Once you’ll enroll a Windows Phone 8.1 device, there are no certificates needed (for device enrollment).

Operating System Supported Version Enrollment Certificate Requirement Notes
Windows Phone 8 Symantec
Windows Phone 8.1 Not required Symantec certificate required if you want to Deploy LoB apps;

Symantec certificate required if users won’t have permissions to download Company Portal App from the Windows Store.

Android 4.0+ / Knox Not Required
iOS 6.0+ Apple Push Notification service certificate

Note: This link contains detailed information about it.

Set Windows Phone 8.1 management in Config Mgr

On Config Mgr, we can set which operating system(s) we want to manage. We’ll configure to support Windows Phone 8.1 management.

Through the Config Mgr Console, follow the path “Administration > Overview > Cloud Services > Microsoft Intune Subscriptions” and click at the ribbon “Configure Platforms” > “Windows Phone”.

Validate if the “Windows Phone 8.1 and later” option is already checked. If not, check it and Apply changes.

018-001

Windows Phone 8.1 device enrollment

This is really easy to do as you’ll see. For this example, I used a simple Nokia Lumia 520.

Path: “Settings > workplace”

018-002

“add account”

018-003

Logon with the Intune account created for this. (Remember the one that was been created on the previous post?!)

018-004

You’ll be redirected automatically to a page which will recognize your tenant branding. Insert your password and select “Sign in”.

018-005

Wait a few seconds and you’ll get the successfully message.

018-006

018-007

On the Config Mgr side, you can check the log “<ConfigMgrInstallationPath>\Microsoft Configuration Manager\Logs\cloudusersync.log” to get more details about the certificate that was generated on the Phone.

018-008

On Config Mgr Console, will take a few minutes until shows the new Windows Phone.018-009

Note: To see more details about it, check this link.

So, what about iOS enrollment? Wait for the next post. 🙂

Enjoy EMS and stay tuned!

/ Fabio

ConfigMgr and MS Intune lab creation – 4th Part | UPN for Cloud Domain and Intune Licensing

Keeping our focus the continue our MS Intune subscription integrated with Config Mgr lab, this post intends to share:

  • AD “on-premises” customization to support “cloud” authentication;
  • Setting Intune licenses management for groups automatically;

Since the users will be authenticated into the cloud with a different suffix that they have “on-premises”, we need to add the UPN of the cloud domain. This means that we need to add the <customizedtenant.onmicrosoft.com> on our AD “on-premises”.

To do that, use “Active Directory Domains and Trusts”.

Right click on the first left option, then select “Properties”.

017-001

On the only available tab – “UPN Suffixes” – add your <customizedtenant.onmicrosoft.com>.

Apply it.

017-002

Now, go to “Active Directory Users and Computers” and create a User. In my case I named it “intuneuser1”

On the “Account” tab, change the suffix of the “User logon name” (always known as UPN) to <customizedtenant.onmicrosoft.com> – set previously on this post.

This change is required to allow the user to authenticate into the cloud.

Set a password which will be replicated to the Azure AD.

017-003

Add it to the AD Group created specifically to Intune and used on the SCCM Collection also (see the previous post).

In my case, I named as “Intune” (I know, I’m not very creative).

017-004

We need to sync these changes right now.

You probably noticed that during Azure AD Connect installation, a Task Scheduler entry was been created. This Task Scheduler is responsible to handle all synchronizations between AD “on-premises” and Azure AD.

The schedule time by default is configured to synchronize both AD’s every 3hours, but is disabled by default as well. Once this is a lab, and never forgetting our focus as usual, we must enabled it, run it and disabled afterwards.

017-005

Note: Is always a good idea to check the log with the Azure Synchronization service > Operations and then check those changes through Azure AD Portal also.

Set licensing – Microsoft Intune

Access to Azure Management Portal.

Click Active Directory and select your tenant directory.

On the top bar, choose the last option: Licenses.

017-006

Click on “Intune A Direct”. The default is 100 Intune licenses to distribute so is perfectly enough for our tests.

017-007

Click on “Assign Users” green option.

Set “Show” to list “All Groups”.

On this screen, your sync AD Groups must be listed. Select the one you set for the Intune users and click “Assign” on the bottom page option.

017-008

For now, you’ve your (Intune) AD group assigned for Intune licensing. You don’t have to set individual licensing.

Following the question on the previous post, it makes more sense manage groups instead of individual users.

Did you remember the last question post? Check the previous post if you don’t.

On the next post, I’ll share my experience of a mobile device enrollment into my lab.

Enjoy EMS and stay tuned!

/ Fabio

ConfigMgr and MS Intune lab creation – 3rd Part | Configuring SCCM

Continuing our “Saga” to have a MS Intune lab integrated with Config Mgr, let’s do the required configurations on SCCM.

So, this post is completely focused on Config Mgr and will be really short, because in fact, there are few and simple steps to do:

  • Configuring a Query to search users based on a specific AD Group;
  • Creating a User Collection (based on the previous created query) to be used for MS Intune;
  • Adding Microsoft Intune Subscription into Config Mgr;
  • Adding Intune Connector role.

As a Pre-Requisite, use the last supported version of Config Mgr: 2012 R2 SP1 / SP2 (With CU1 applied as a recommendation).

Why do I suggest to use a Collection based on specific AD Group?

Because it will make the Microsoft Intune licensing association simpler. In the near future, when you’ll need to set MS Intune licenses to your “employees”, will be easier to manage for Groups instead of single users. So, on the Microsoft Azure Portal, you can set Microsoft Intune licenses to a specific AD Group (which needs to be migrated to the cloud of course). Once this group is licensed to Microsoft Intune, the only thing you’ll need to do consists on managing this group. Otherwise, you’ll probably will die associating each license per each user (and you don’t want that).

Confused? On the next post, you’ll understand better this suggestion and the associated mindset as well. On the other hand, if you want, you can skip it and just create an empty User Collection.

Creating Query based on AD Group

  • Create an Active Directory Group User Group to be used by Intune;

Create a similar query and replace “DOMAIN\\GROUPNAME” values.

016-001

Query:

select SMS_R_User.Name, SMS_R_User.UserName, SMS_R_User.WindowsNTDomain, SMS_R_User.NetworkOperatingSystem, SMS_R_User.AgentName, SMS_R_User.AgentSite, SMS_R_User.AgentTime, SMS_R_User.ResourceId, SMS_R_User.ResourceType, SMS_R_User.UniqueUserName from SMS_R_User where SMS_R_User.UserGroupName = “DOMAIN\\GROUPNAME”

Now, you can create a User collection based on this query.

Keep in mind that this collection have a single target and should not be used for any deployments (or any Advertisements as an old fashion term) and should have no members as well.

Adding Microsoft Intune Subscription on ConfigMgr:

Following the path: “Administration > Overview > Cloud Services > Microsoft Intune Subscriptions”. Now, choose “Add a Microsoft Intune Subscription”

016-002

Will be opened the following screen.

016-003

And you’ll be asked to “Sign In”.

016-004

This is an important warning: All mobile device management will be part of Configuration Manager now. According to that, all policies, profiles and so on will be created and managed on the SCCM side and this cannot be changed anymore.

016-005

It will redirect to the IE Session to get the Microsoft Intune credentials (you must logon with Tenant admin for this).

016-006

Add insert the collection created previously (User collection).

016-007

It looks like you need to add a Site System role. Let’s do this.

016-008

Through the path: Administration > Site Configuration > Sites > Add Site System Roles

Check “Microsoft Intune Connector”.

016-009

Quite simple, right? 🙂

Enjoy EMS and stay tuned!

/ Fabio

ConfigMgr and MS Intune lab creation – 2nd Part | Azure AD Connect

As promised, on this post I’ll be focused around “On-premises” connector.

Note: This post is directed for lab scenarios. Don’t reproduce it on a production environment.

So, why do we need a connector? Our goal on these post series consist on demonstrate a lab scenario based on the following “On-Premises” servers:

  • Domain Controller (2012 R2);
  • Configuration Manager 2012 R2 SP1;

Again, these two servers are configured on-premises. As we know, Microsoft Intune and Azure AD are based on the “cloud”. If we need to manage users/devices on Microsoft Intune, we need to set up those to the cloud.

So, which options do we have to manage users into the cloud? Actually, two:

  • Creating users directly on the Azure AD to be used by Microsoft Intune;
  • Migrate users “On-premises” through a Microsoft connector.

Let’s try the second one, of course 🙂

To do that, we’ll use a tool named “Microsoft Azure Active Directory Connect“. Download it here.

Keeping focus on scenario (This is a lab!), it doesn’t matter each server will take the tool installed so you can install it on the SCCM Server or on the DC, or if you’ve enough space and resources on your lab, create a specific Virtual Machine to support that. Go ahead to the installation choosing “Use express settings”.

015-001

On the “Connect to Azure AD” pane, introduce Tenant admin credentials.

015-002

After the first successfully connection to Azure Cloud, you’ll be prompted for the On-Premises credentials. Click “Add Directory”.

015-003

Warning: This is really important. Do not ever forget to uncheck the option “Start the synchronization process as soon as the configuration completes”. Because if you do, you are simply allowing the entire synchronization of your Active Directory to the cloud! This won’t never happen!

015-004

Password Synchronization is being applied automatically. Pay attention because this feature is responsible for the local authentication into the “cloud”.

015-005

Will take some minutes until the configuration complete message.

015-006

We didn’t synchronized any object yet, because we need to configure the connector first. To do that, we’ll use an application named “Synchronization Service Manager” installed with “Azure AD Connect”.

Shortcut location: C:\ProgramData\Microsoft\Windows\Start Menu\Programs\Azure AD Connect

Tool location: C:\Program Files\Microsoft Azure AD Sync\UIShell\miisclient.exe

Have you got his message? Follow this link.

015-007

Select the “operations” tab. Click on domain signed with the “Type” named “Active Directory Domain Services”, and click “Properties” on the right pane. Select “Configure Directory Partitions” tab and click at “Containers”. Introduce credentials.

015-008

Clear all default selections, and check only your customized Users/Groups OU(s). Only that!

Apply these changes.

015-009

Once we’ve the connector well configured, let’s do the first synchronization. We’ll use PowerShell! 🙂

Start synchronization:

Will be placed on the Desktop a shortcut to the “Windows Azure Active Directory Module for Windows PowerShell”. Double click on it.

015-010

Run “DirectorySyncClientCmd.exe initial” instruction on the following path:

C:\Program Files\Microsoft Azure AD Sync\Bin

015-011

Check all transactions through “Synchronization Service Manager” – tab “Operations”.

On the Azure Portal will see these users on the “Active Directory” > «YourTenantDirectory» > “Users”. Check “Users” sourced from “Local Active Directory”.

015-012

Done for today!

The next post will cover the System Center Configuration Manager R2 SP1 configurations to support the Microsoft Intune.

Stay tuned and Enjoy EMS!

/ Fabio

ConfigMgr and MS Intune lab creation – 1st Part | Creating required Subscriptions

As promised, I’ll start to share my experience to cover a lab environment focused on System Center Configuration Manager R2 SP1 / SP2 integrated with Microsoft Intune. Not only on the device management (which belongs directly to MS Intune), but also the Azure Active Directory to manage users and groups accounts into the cloud.

A crucial starting point consists on set two required subscriptions namely: Microsoft Azure and Microsoft Intune.

Creating Microsoft Azure Subscription:

  • Follow this link and choose the option “Try it now”;
  • Sign in with a Microsoft live ID. If you don’t have one, sign-up for free. Please note that you can only sign up for a Microsoft Azure once per email, so don’t re-use a previously one;
  • After that, you’ll only need to fill the fields and including your banking data (yes, it’s really necessary);
  • Wait a few moments, and you’ll get your “Default Directory” ready;
  • After that, close your IE session. It’s a good idea because you’ll manage distinct accounts (Microsoft Live ID and Tenant Account) and the IE will get your credentials and will try to authenticate you with automatically.

On this phase, you don’t have your customized Azure AD Tenant yet. What is a tenant? Basically, and in a very high-level view, consists on your domain address into the cloud: <something.onmicrosoft.com> which will be resolved on the web. Keep in mind that you’ll never choose a customized tenant during Azure subscription. You can integrate a customized tenant from Office 365 and MS Intune later. To see more details about Tenant info follow this link.

So, since we didn’t set any integration, on this phase we only have a “Default Directory” which, on this lab, will be used for…nothing! Yes, for nothing. And please, keep in mind, on Microsoft Azure portal, you’ll sign in always with a Microsoft Live ID account.

Creating Microsoft Intune Subscription:

  • Through the link, set your “lab” info, and check if the “New domain name” (tenant) that you chose is available.
  • Note: If you’re using this lab creation but already have an Office 365 subscription, select the option “Sign in” instead and login with your Office 365 tenant Admin, to configure a single tenant for these two services – MS Intune and Office 365.

014-001

  • After that, configure your tenant Admin who will be configured as a “Global Administrator” by default. This user, should be used for every logon into Microsoft Intune Management Portal (unless you want to create other(s) Global Admins to manage it);

Integration between Microsoft Intune tenant and Microsoft Azure:

So, resuming, we already set two separate subscriptions: a Microsoft Azure (with a default directory creation) and a Microsoft Intune subscription (with a customized tenant account). As mentioned, is a good idea to integrate both.

With this integration, you’ll gain many Advantages:

  • Once many “cloud-service” (Office 365 and MS Intune) platform has its own “directory” behind, we can manage users, groups and others configurations through the Azure Management Portal.
  • A single point of management with the “multi-tenant” capability provided by Microsoft Azure;
  • You can keep ConfigMgr focused on policy/device management and the Azure focused on Users/Groups management;

How to integrate MS Intune tenant into Microsoft Azure Subscription:

  • Logon into the Microsoft Azure Management Portal;
  • On the bottom side, click on “New” > “App Services” > “Active Directory” > “Directory” > “Custom Create”

014-002

  • We’d already a MS Intune subscription, or in this case, a “Directory” to be introduced on this Microsoft Azure subscription, so let’s select “Use existing directory” and check the “I am ready to be signed out now” option;

014-003

  • You’ll be asked to introduce the tenant admin credentials. (Again, the created user on Microsoft Intune subscription).

Back to logon into Microsoft Azure portal, on the left pane click on “Active Directory”. Now, you’ll see two domains:

  • Default Directory
  • <YourTenantDomain>

014-004

For now, all required subscriptions are made.

On the next post, i’ll be focused around Azure “On-Premises” connector – Azure AD Connect.

Stay tuned and enjoy EMS!

/ Fabio