ConfigMgr and MDT OSD | Diving into BitLocker steps

Did you asked yourself about both Bitlocker encryption steps provided by ConfigMgr and MDT task sequences? Well, I did. So, when a customer asked me to include BitLocker encryption I made a few research about this theme to understand each of one differences between them. Below, I try to share a few knowledge about it.

ConfigMgr and MDT integrated scenario:

Let’s consider the scenario on having ConfigMgr integrated with MDT as a starting point, since this is the most used scenario in our customers (at least I hope).
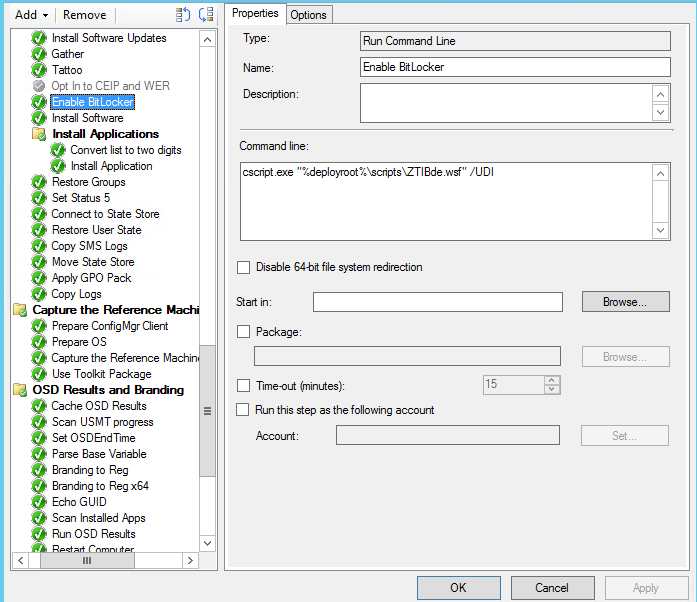
For those who use OSD in that way, this is what you’ll find when you create an MDT Task Sequence in your ConfigMgr console:
027-001

The presented “Enable BitLocker” step is nothing more than an execution of a ZTIBde.wsf script file (executed from the MDT Scripts Package).

The script basically provide a full set of steps (like OS versions, Physical disks, etc.) to validate if the target computer is available for Bitlocker encryption. After performing all validations process, task sequence will start the encryption task using the Windows native tool named “manage-bde.exe” located in the %system32% folder.

027-012

As a last step, the script will place a text file with the Recovery password info into C:\ drive.

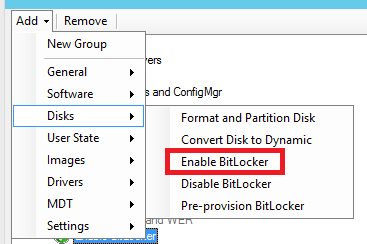
Otherwise, if you want to use the native ConfigMgr BitLocker step from Task Sequence, you can add it on the Disks option into the “Add” pane on top of the page.
027-002

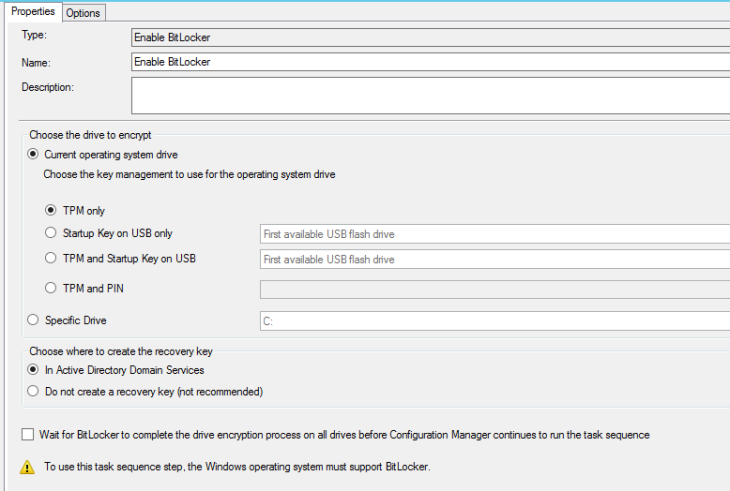
Task Sequence will present the following properties pane as a simple wizard and very similar to the BitLocker page on UDI Wizard.
027-003

What will be performed here?

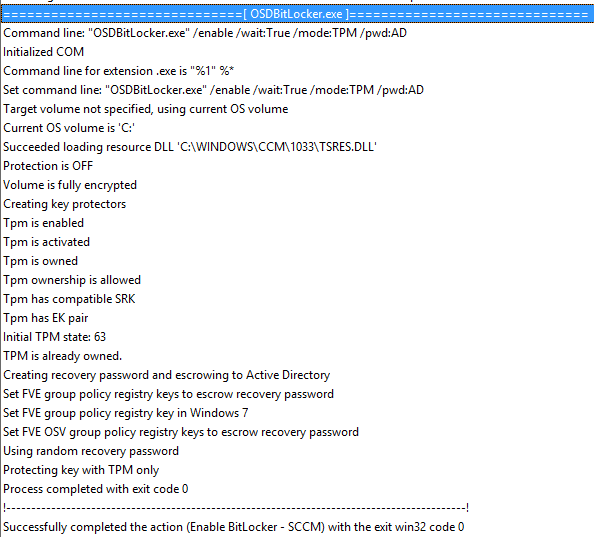
Not so visible like MDT does, but task sequence will run a tool named “OSDBitLocker.exe”. The tool is located into the ConfigMgr installation folder and is copied as a package during OSD process and will do the following steps:

  • TPM Validation;
  • Create the protectors (Recovery Password);
  • OS disk encryption;
  • Set the recovery password to AD (if configured).

027-004

Diving into smsts.log
027-007

MDT Lite Touch:

As you probably know, this is my favorite deployment type. Not only because this is the faster way to deploy customized Operating system images, but is the cleanest and easiest way (with no dependencies) to deploy Windows.
So, when we create a task sequence, this is what we’ll see:
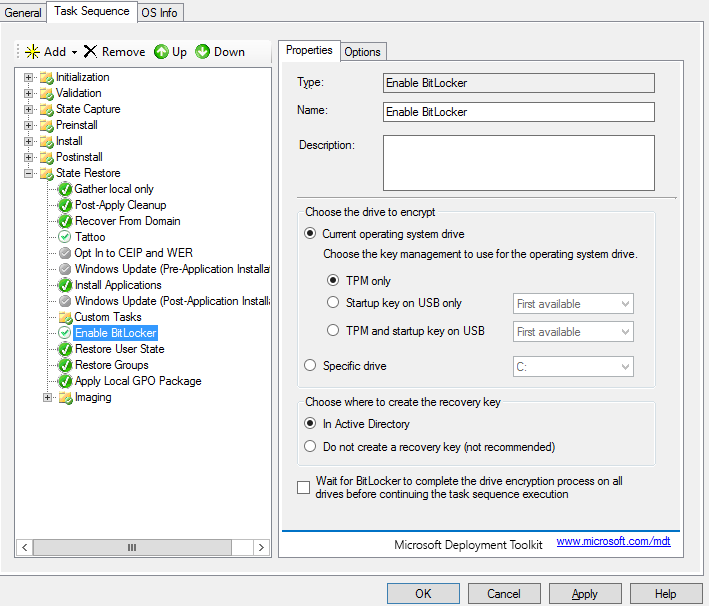
027-010
And for options pane, MDT provides us:
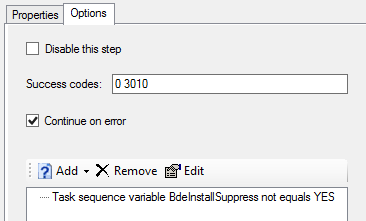
027-011
Not difficult to understand, because this is shown in a “Wizard” mode and the variable “BdeInstallSuppress” shouldn’t be YES (via CS.ini or TaskSequence variable).

Additional tip 1:

Since “manage-bde.exe” is a native Windows tool you just can test it in an isolated Laptop/workstation to test it (not with VMs. Check additional tips to understand it better).

In the other hand, if you want to test the OSDBitLocker tool in a completely offline and outside of deployment process, avoiding the wasted deployment duration, just copy the required files and put them in an external USB (for example).

Execute the following command:
027-006
And wait for the BitLocker encryption to be done.


Additional tip 2:

Are you thinking of using this on a VM? You don’t need even to try it. The script will check the physical volumes through WMI and the process is fully explained below.
Namespace: Root\CIMV2\Security\MicrosoftVolumeEncryption
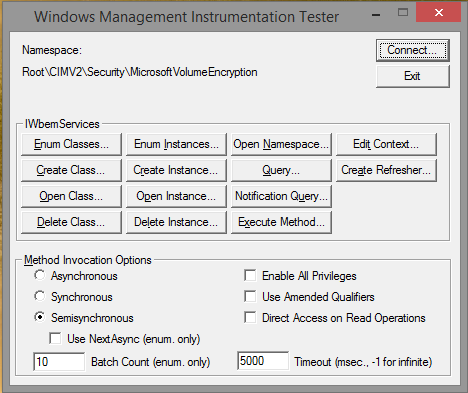
027-008
Query: SELECT * FROM Win32_EncryptableVolume
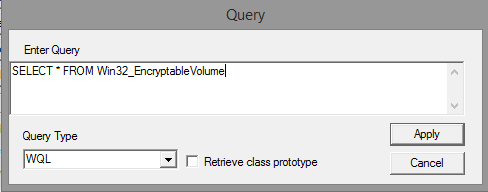
027-009
We you select the “Apply” option, it will be shown every encryptable drives in the current machine.
Try it in a virtual machine to see the reason why it fails every time on them. 🙂

Happy deployments!
/ Fabio

Introducing Azure AD Join and Domain Services

As we know, Windows 10 became available in August with a lot of benefits to our customers, and with “him”, several cloud changes were been questioned. In the near future, Microsoft Azure will assume a crucial role at most of global organizations, and even the most skeptical IT decision makers will be surrounded to their benefits and felt excited with that.

Azure AD consists on a directory behind Office 365 and Intune subscriptions. So, if we want to manage Windows 10 devices (Laptops, Surfaces..) through Azure AD, we’ve two options:

  • Azure AD Join
  • Workplace Join

These two options have distinct goals. Let take a quick dive on it.

Let me start with the Workplace Join. Resuming, consists on a feature built natively for Windows 8.1, which allow users to access to specific identified corporate services and resources. Was been improved for Windows 10, and allow the employee who uses their personal phone (or computer, or tablet,…) to extend its (or their) functionalities. Basically, consists in a high-level trust mechanism established between organization and employee. The resource (phone, computer, tablet,…) will be represented on the Azure AD and provides to IT an assessment view and reporting, but as expected, provide only few actions and control about them. Is directly built and designed for BYOD scenarios.

In the other hand, if your IT dept. are distributing provisioned Windows 10 devices to employees which will have mainly accesses to Office 365, web apps (deployed through “My Apps” portal) and other “cloud-based” resources, the Azure AD Join should be your choice. Provide several gains to the prior one including the Windows 10 login with Azure AD accounts/credentials and the Single-Sign-On for cloud-based (and On-Premises) services and resources. In addition, provide a crucial improvement – providing the native Microsoft Intune enrollment during its join.

It’s impossible not talk (or write in this case) about the Domain Services of Azure AD, which is currently in Preview and released recently by Microsoft. Domain Services is still a «baby» and according to that fact, will grow significantly for sure in the next weeks, which in fact can have some risks if you’re considering this implementation in a short period. Despite of that, Domain Services provide the possibility to consuming local Group Policy Objects (GPOs) and deploy them via Azure AD, or to create new ones (and deploy them of course). The main goal will be achieved: manage all supported devices through the cloud just as your doing now On-Premises. Additionally, Domain Services will integrate natively with the current Azure tenants (could it be in a different way?).

Let me share some deep sources about it Azure AD Join and Azure AD Domain Services.

Enjoy Azure AD!

/ Fabio

Windows 10 – Using PowerShell to generate your own WindowsUpdate.log

Windows 10 has many improvements. That’s not a new. What is a new is that Microsoft implemented a new concept to read the “old” WindowsUpdate.log file. Guess what does it requires? PowerShell!

As a good starting point, check for the C:\Windows\WindowsUpdate.log file as you’ll always do. You’ll realize that is placed as it was always, but will a little differences.

Step-by-step guide

  1. Search for it as you always did.

I’ve searched for the windows update log and I realized that Microsoft just put it where it always belong: C:\Windows\

023-001

When I opened it, found this:

023-002

The message is well explained. Get your Powershell window prompt to convert it in a “Temp” readable log.

  1. Use PowerShell! It will traduce the “unreadable” file into a friendly one which will allows you to check its content.

023-003

  1. The final message will post where the generated log file was placed.

And the generated file has the similar “old content” and same “old” look:

023-004

Enjoy Windows 10 !

/ Fabio

Windows 10 – Improvements on removing from domain

In the earliest Windows versions, how many times did you stuck (and froze) after removing your computer from the domain because you couldn’t logon (with a local account) after then? Because…you just forgot to setup a local account on the computer? Or you found no need to configure a GPO to setup local accounts?

From my side: a few!… And the causes were multiple: since the built-in administrator which was been disabled automatically (e.g.: on Windows 7 after OS Deployment) until simply forgot those local accounts passwords. Concluding, was always a big mess.

Well, here it goes the good news: for Windows 10, when you try to remove your machine from the (On Premises) domain, you’ll get this amazing prompt window which will ask your local account credentials to ensure that you’ll have access to your device after its mandatory reboot.

022-001

And you’ll get a “Reboot” required action to reminds you.

022-002

Enjoy Windows 10!

/ Fabio